What Is White Balance and How to Use It for Better Color
Not all secrets to better photography are complicated. White balance is one of the easiest fundamental things that you can do right in camera to instantly create a better image from the start with less post production time. Let's look at what works and what doesn't for good white balance.
First, understand that white balance is the camera's way of correcting for different color temperatures of light. The human eye and brain work together to automatically correct color under any conditions, so under any light white looks white to our eyes, but cameras can't do this, so they need the help of white balance to tell them what to correct for and how much.
Each light source burns at a different temperature, from blue to orange to green for most light sources. The sun is a fairly neutral source, which renders colors as they are. Tungsten light bulbs, however, burn orange and without correction the camera will record objects in tungsten light with an orange color cast. To correct for color cast, in this case tungsten, you need to set a certain white balance that tells the camera to compensate for the orange by adding a certain amount of blue.
Ever get an image that looks orange? It's not uncommon because most people shoot a lot of photos indoors at parties, where the light is usually tungsten, and they're not aware of white balance, so they use auto or daylight, which will render tungsten light orange.
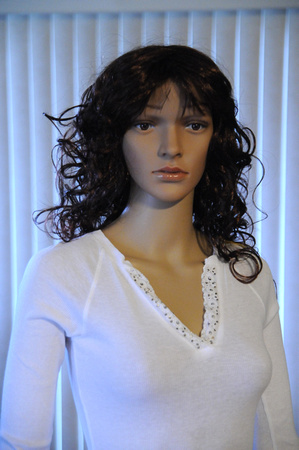
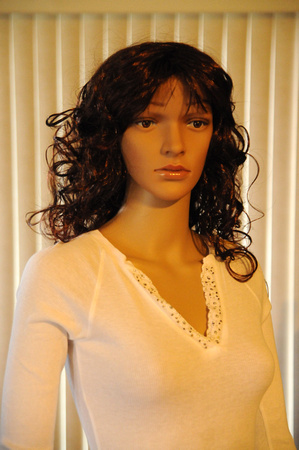
To get better color, set the correct white balance. While the white balance in this image is near perfect, the lighting is not ideal as the subject is lit by two different light sources: tungsten from the front and daylight from behind. Correcting for the tungsten light leaves the daylight to turn blue. When possible, do not mix light sources. Shoot under one main light and set the white balance for that light.
Auto WB
There are a few ways to set your white balance using the WB control on your camera. The most common, and the most often incorrect, is auto. This simply tells the camera to choose based on what it sees through the lens and it's often incorrect since many scenes don't have white to give the camera a reference point. Auto mode is OK for daylight, and it can get you in the ballpark when you can't identify the light source, but there are better and equally easy ways to achieve correct white balance.
Match the Preset to the Source
Another method is selecting a preset other than auto, indicated by a symbol, such as the sun, a light bulb, or lightning bolt for flash. This is better than auto because it tells the camera what light source you're shooting under so the camera has a precise idea of what to correct for. Set the symbol to match the lighting condition you're in, and you'll instantly have better results than auto, but still not perfect.
Kelvin Scale
An even more precise method is to set the degrees Kelvin, which is the measuring unit for color temperature, to match the Kelvin of the light source. This requires knowing what Kelvin temperature the light source is. You'll need experience, or a chart, to set the correct Kelvin. For example, daylight is typically around 5500K, give or take a few hundred. Tungsten is typically around 3000K. By setting the Kelvin, the camera can record even more precise color than some presets, but still not perfect.
Custom
To achieve nearly perfect white balance, you need to do a custom white balance. This requires a neutral target, which must be manufactured for this specific purpose. Follow the camera manual's instructions to set up custom white balance and then take a photo, properly exposed, of the neutral target. The camera will indicate whether the image is good or not. When you get a good image, simply start shooting with that custom white balance setting. You'll need to do a new custom for each light source when you encounter it.
Neutral targets are readily available at major camera stores. They include cards, discs and objects that you can place in the image for reference in post production. The one I use most is the ExpoDisc 2.0 from Expo Imaging. I also use the X-Rite ColorChecker Passport. Other tools include the Spyder Cube, Gary Fong dome and spectrally neutral gray cards.
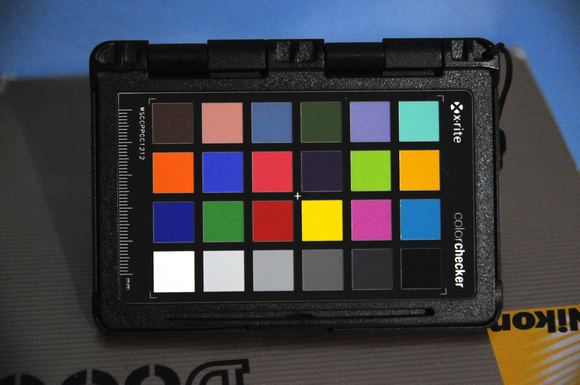
 The X-Rite ColorChecker Passport is a portable color calibration target. It contains three cards: a color checker, warming and cooling patches for landscape and portrait work, and a neutral white card for custom WB in camera. Above is the color checker portion, which can be used as a reference for correct white balance in post by clicking the white patches with a white balance picker, as well as creating custom camera profiles, which automatically correct color for a given spectrum of light (requires RAW files).
Below is a series of images showing a subject photographed under the same light -- a continuous light balanced to 5600K -- recorded using different white balance techniques. All settings remained the same except white balance. The images were not corrected for color in Photoshop.
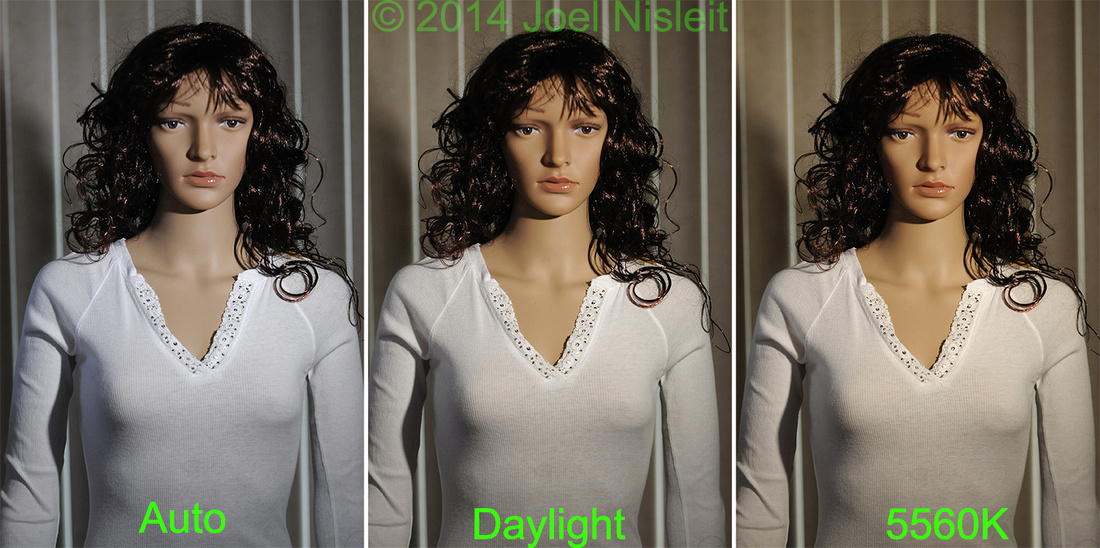
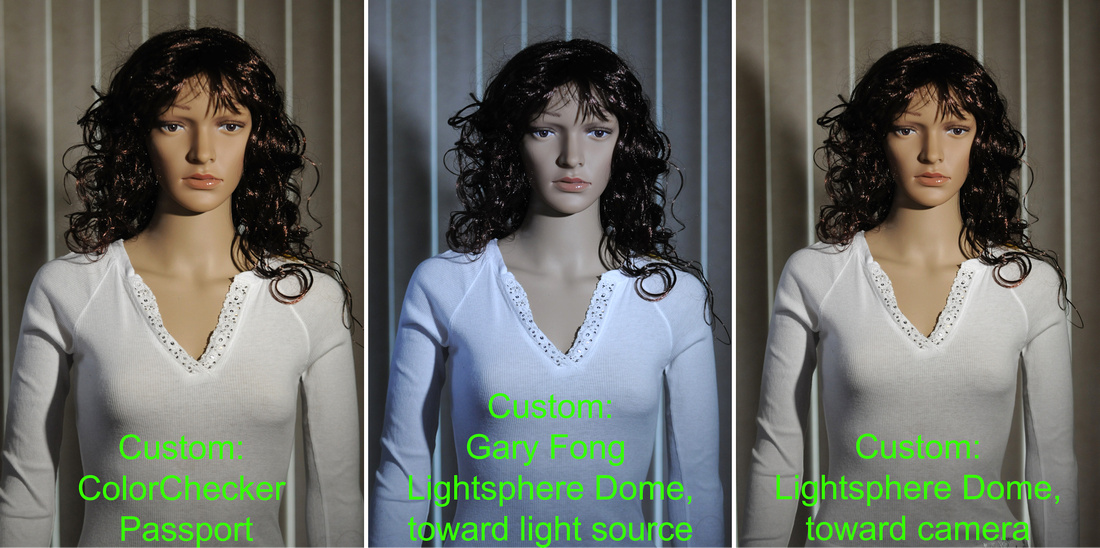
Accurate whites and skin tones are especially important in portraiture, so being off even a little bit can make post production more difficult, and sometimes it's difficult to see how bad colors are until you compare them to colors you know are correct. The image created using the ColorChecker Passport for custom white balance is the most accurate. Although auto is good, on a calibrated monitor you'll probably see a bit too much blue creeping in.
Getting white balance correct in camera is especially important when shooting JPEG because a JPEG image is finalized in camera, leaving almost no latitude for correction later. White balance is less of an issue with RAW because you have unlimited latitude for correcting it later, but incorrect white balance will still add time to the workflow and doesn't work when you're showing clients images on the LCD as you make them.
Just because I covered a variety of methods doesn't mean you need to use them all. Accurate color with white balance is easy to achieve just with presets, which are better than auto. Custom white balance may seem like too much work, but it's so simple to do in camera and it just requires one extra shot to save minutes or hours in post production. Most professionals use some form of precise white balance technique every time they shoot. It's simple, but not all secrets are complicated.

Comments